Home Assistant在2024.06改變了File Notify Service用法,將訊息寫入檔案這個動作由服務(Service)變成一個實體(Entity)。Notification的說明文件裡找不到相關的描述,後來才發現是在File的說明文件裡。例如要把魚缸相關的通知寫進aquarium.txt裡,再給後續的應用做處理,以下是我的步驟:
1. 從「整合」頁面中新增「File」整合
Home Assistant側邊欄中選取「設定」→選取「裝置與服務」→在「整合」頁面的右下角按下「+新增整合」→新增「File」整合
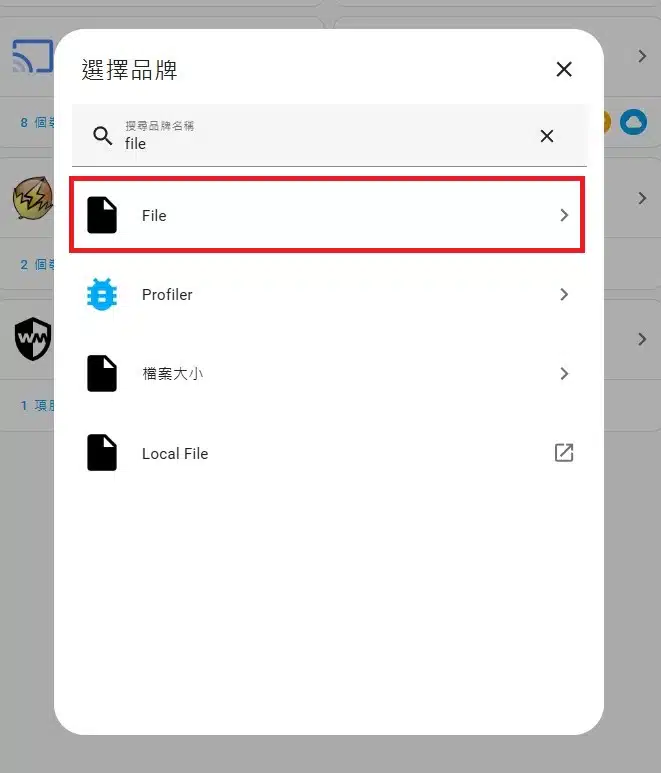
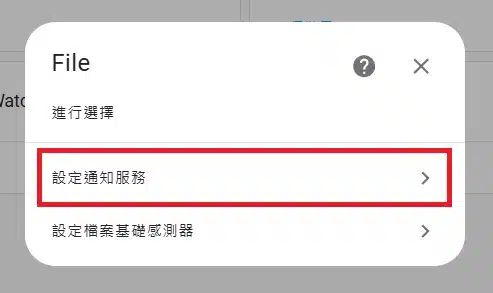
2. 選「設定通知服務」
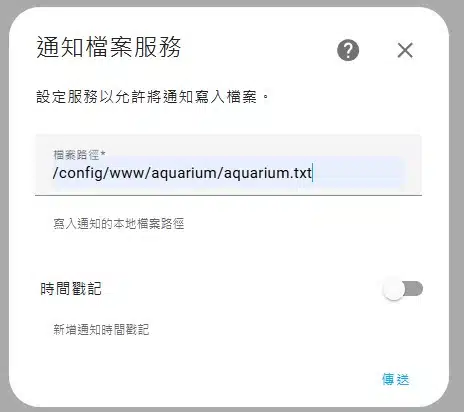
3. 指定通知檔案路徑
填入要放入Notification的檔案名稱,需包含資料夾路徑。系統時間戳記的格式是ISO 8601 ,這種表示法我不喜歡因此沒有勾選,而是在寫入檔案時將戳記寫進去。
4. 重新命名實體
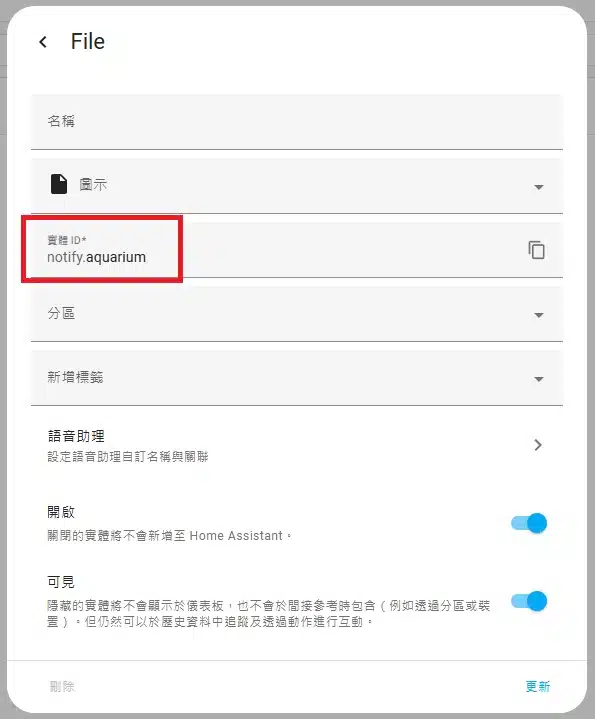
Home Assistant側邊欄中選取「設定」→選取「裝置與服務」→在「實體」頁面下找notify相關的實體可以找到notify.file,找到後將實體重新命名,例如notify.aquarium。
5. 重新啟動Home Assistant
6. 透過service: notify.send_message將通知寫入檔案
可以在腳本或自動化裡的action放入service: notify.send_message,就可以將通知內容寫入檔案。例如在魚缸進入維護模式時,會用自動化帶出通知。
- alias: Aquarium:Maintenance_Mode_On
  trigger:
    - platform: state
      entity_id: input_boolean.aquarium_maintenance
      from: "off"
      to: "on"
  action:
    - service: notify.send_message
      target:
        entity_id: notify.aquarium
      data:
        message: >
          {{ now().strftime('%Y/%m/%d %H:%M:%S') }}
          維護模式開啟。
  mode: queued
自動化成功執行後就可以到先前建立的檔案中查看內容
Home Assistant notifications (Log started: 2024-09-26T03:24:19.008532+00:00)
--------------------------------------------------------------------------------
2024/09/26 11:24:23 維護模式開啟。
