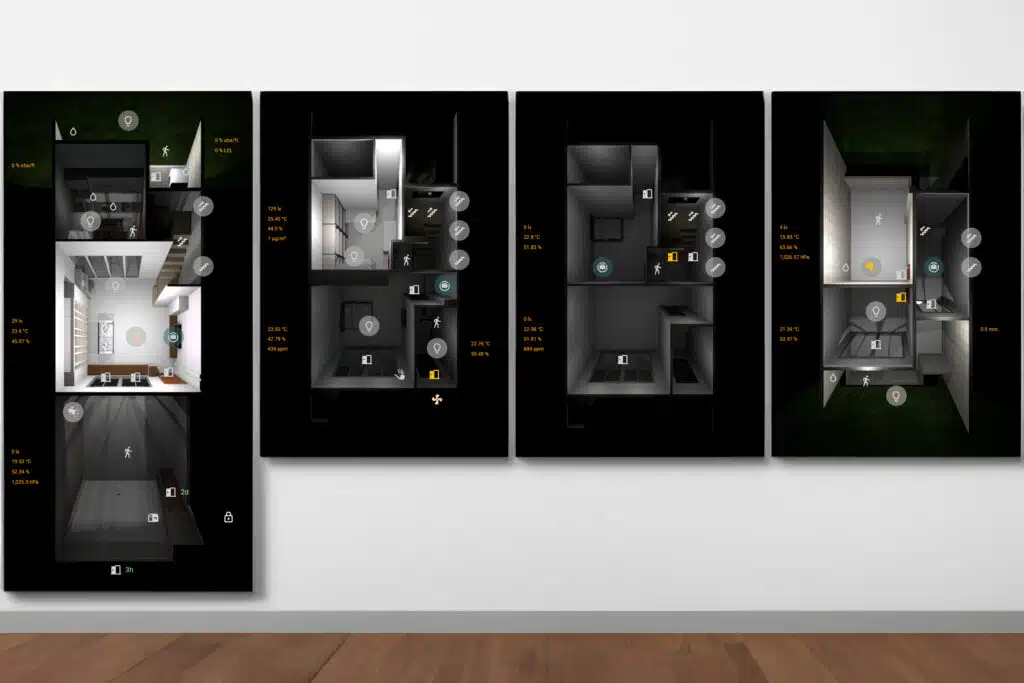
在我的Home Assistant的設計裡,每個樓層都有一個獨立的分頁,但如果將單一功能(比如每個房間的燈光控制、家電控制或各種感應器狀態)分別放在不同區域,就會顯得有些混亂。相反地,若能夠在一張樓層的3D圖中放入各種功能(實體)就會更加清晰明瞭。
在這個設計中我還用上了燈光渲染,利用燈光渲染不僅可以呈現白天和晚上的區別,還可以顯示出燈光開啟或關閉下的狀態,甚至不同的燈光亮度可以有不同的變化,全部做完之後我自己也是相當滿意。
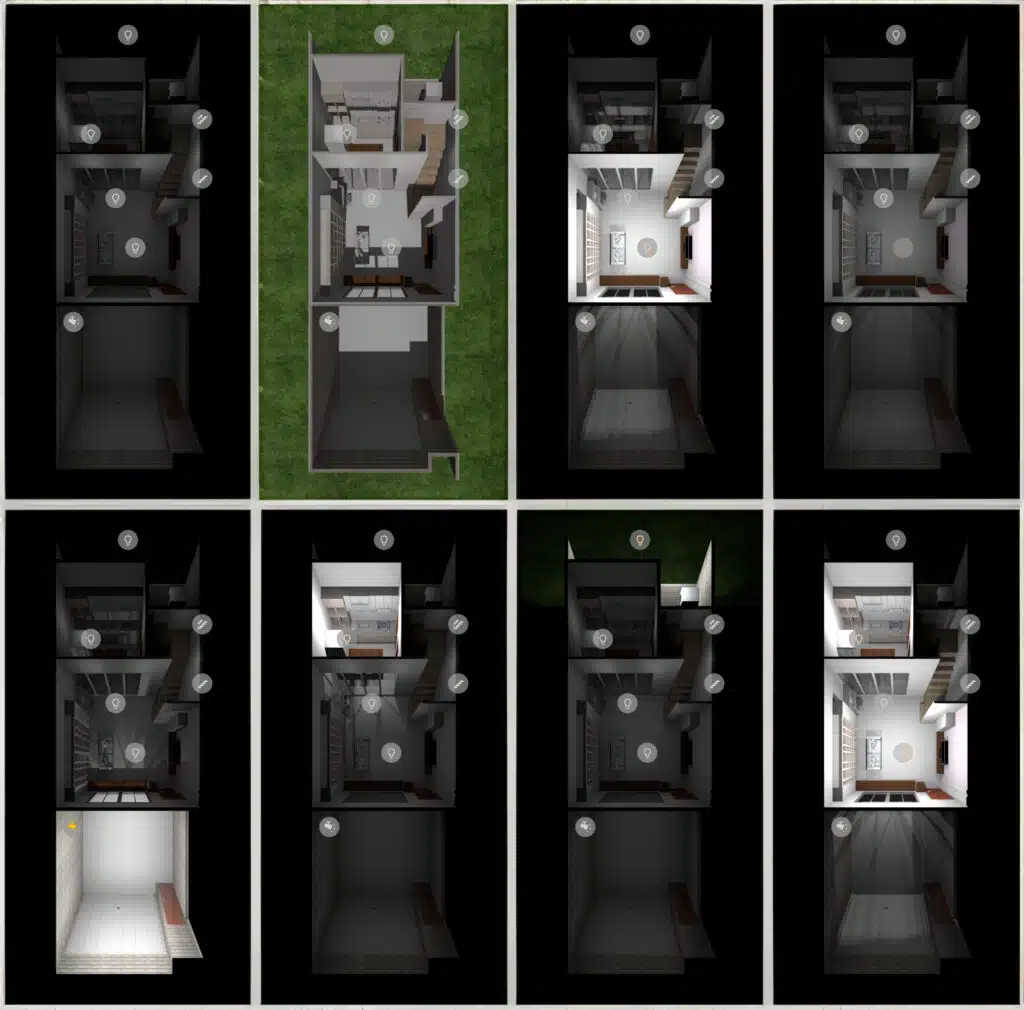
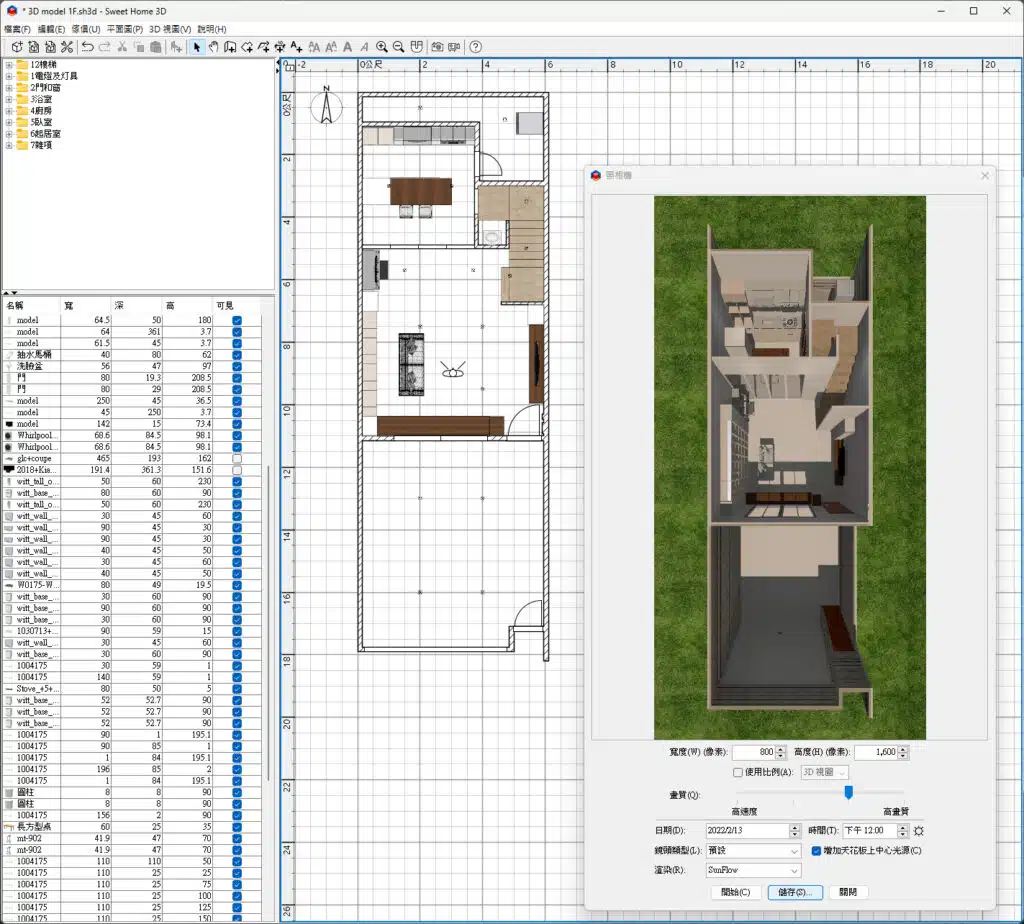
樓層3D圖使用SweetHome 3D製作,這跟個人製圖能力與細心程度有關,這裡不多做說明。在放置燈光後,利用「照相機」的功能來執行燈光渲染,並將各種單一燈光渲染的結果儲存下來供後續使用。
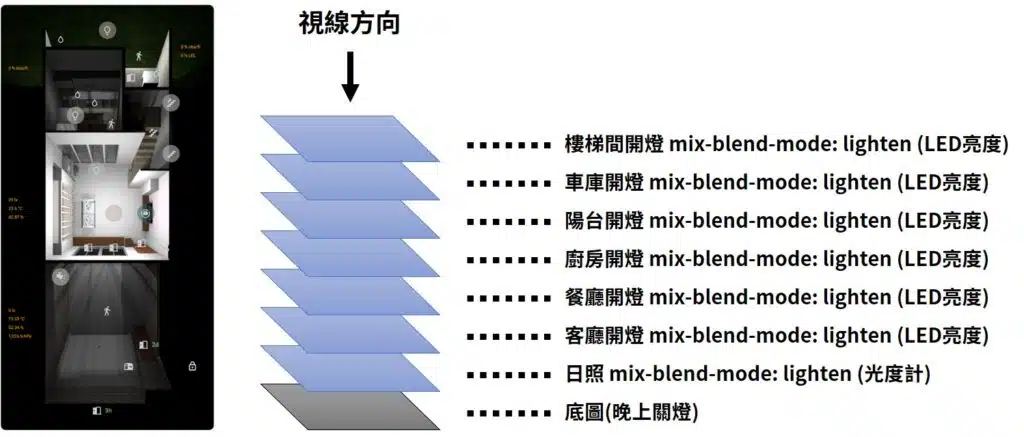
再利用CSS的mix-blend-mode屬性中的lighten混合模式進行條件式的覆蓋,這樣的設計確保了最底層呈現晚上關燈的效果,然後逐層將各種情境的堆疊上去,根據條件進行增亮效果的覆蓋。
使用Home Assistant的picture-elements card搭配custom:config-template-card時,你可以實現這樣的效果。以一盞燈和一個門窗感應器為例,需要準備以下素材:
- 一張晚上關燈的3D圖當底圖
- 一張燈光渲染圖表示燈光開啟後的效果
- 一個燈光圖示來表示燈的位置
- 一個門窗感應器圖示來表示門窗感應器的位置
以下是這個範例的程式碼
type: vertical-stack
title: 區域動態與照明
cards:
  - type: picture-elements
    image: /local/floorplan/1F-BASE.png
    elements:
      - type: custom:config-template-card
        variables:
          - states['light.livingroom'].state
        entities:
          - light.livingroom
        element:
          type: image
          image: /local/floorplan/LIGHT-LIVINGROOM.png
        style:
          mix-blend-mode: lighten
          opacity: >-
            ${states['light.livingroom'].state === 'on' ?
            (states['light.livingroom'].attributes.brightness / 255) : '0'}
          top: 50%
          left: 50%
          width: 100%
      - type: state-icon
        entity: light.livingroom
        icon: mdi:lightbulb-outline
        tap_action:
          action: toggle
        style:
          top: 49%
          left: 53%
          '--paper-item-icon-color': lightgrey
          border-radius: 50%
          background-color: rgba(180, 180, 180, 0.6)
      - type: icon
        entity: binary_sensor.garage_door_contactsensor_contact
        icon: mdi:door-open
        style:
          top: 80%
          left: 67%
        card_mod:
          style:
            ha-icon:
              $: |
                ha-svg-icon {
                  {% if is_state('binary_sensor.garage_door_contactsensor_contact', 'on') %} color: indianred; {% else %} color: lightgrey; {% endif %}
                  {% if is_state('input_boolean.garage_door_timeout', 'on') %} animation: blink 0.5s linear infinite; {% endif %}
                }
                @keyframes blink {
                  0% {opacity: 0;}
                  49% {opacity: 0;}
                  50% {opacity: 1;}
                }
      - type: custom:last-changed-element
        entity: binary_sensor.garage_door_contactsensor_contact
        icon: mdi:door-open
        style:
          top: 80%
          left: 71%
          color: lightgreen
          max-width: 1px
當使用picture-elements時,它包含兩個主要部分:
- image:這是底圖,路徑指向使用的圖片,本例中/local/floorplan/1F-BASE.png就是底圖的路徑。
- elements:這包含一個或多個元素(element),每個元素都代表在底圖上的一個實體。此例中有四個元素,分別是燈光渲染圖、燈光圖示、門窗感應器圖示和門窗感應器最後變更狀態的時間。每個元素(element)會指定一個實體(entity)、位置(coordinates)、樣式(style)以及在特定條件下的顯示狀態。
四個元素分別解釋如下:
- 第一個元素用到了type: custom:config-template-card,這部分主要將客廳燈光全開的渲染圖(/local/floorplan/LIGHT-LIVINGROOM.png)依照LED亮度做不同程度的透明化,再靠mix-blend-mode: lighten做加亮並疊加到底圖上,custom:config-template-card可以監聽指定的實體,當實體的狀態有變化可以馬上更新。
- 第二個元素用到了type: state-icon,主要是將客廳燈的實體(entity)做成圖示並放在底圖上,按下去就能夠開關燈(toggle)。
- 第三個元素用到了type: icon,負責將車庫門的門窗感應器做成圖示並放在圖上,並利用card-mod去依狀態改變顏色,平常門關起來時是灰色,門開起來變紅色,而開太久超時之後就會紅色閃爍。
- 第四個元素是額外加上去的,用到了type: custom:last-changed-element,它可以抓出門窗感應器最後變更狀態的時間,一看就知道上次開或關門是在多久之前。
