Nginx(發音為Engine-X)是一款開放原始碼的軟體,屬於非同步框架的網頁伺服器。它以低資源、高性能和高度模組化設計著稱,同時具有反向代理、負載平衡和HTTP快取等功能。Nginx是由俄羅斯程式設計師Igor Sysoev於2004年開發,後來在2011年成立同名公司,提供相對應的支援服務。
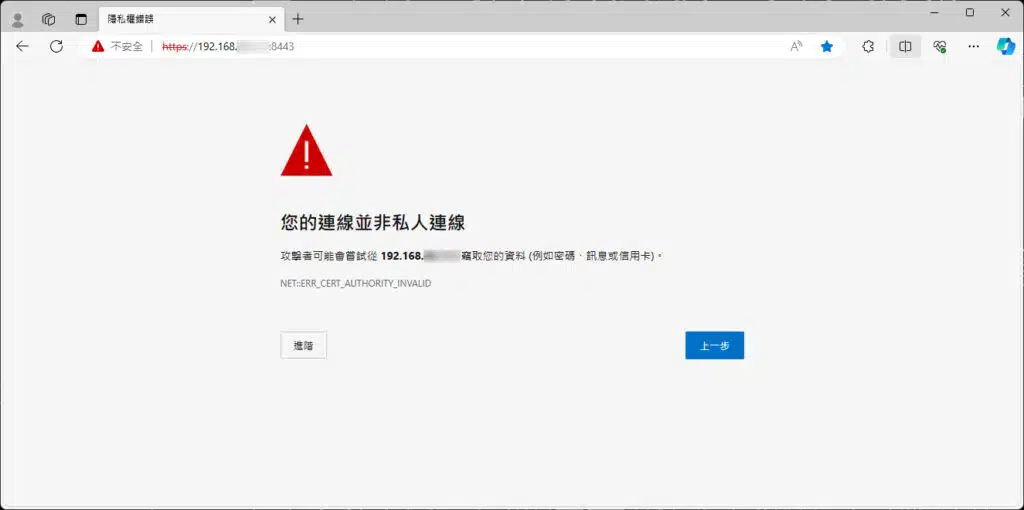
我安裝Nginx的主要目的是拿來當做各種服務的反向代理伺服器,並申請一個TLS/SSL憑證(以下簡稱憑證)掛在Nginx上,讓所有服務都可以使用這個單一憑證。在架設Nginx之前,我的Home Assistant透過內建的duckdns附加元件去申請duckdns的免費域名和由Let’s Encrypt頒發的憑證,Synology DSM則是用他們自家的免費域名synology.me以及自我簽署憑證,WireGuard則借用了duckdns做轉址,而Unifi Controller雖然強制使用HTTPS連線但卻沒有對應的憑證,所以每次連線都會跳出隱私權錯誤的訊息,整體上就有亂七八糟的感覺。
趁著這次架設WordPress,網誌重新開張的同時順便打掉重練,申請了一個新的域名tzungshiun.com、掛上Nginx做各項服務的反向代理並向Let’s Encrypt申請憑證,利用Certbot做憑證的自動更新,這樣從WAN進來的連線都是加密的HTTPS連線,LAN裝置之間互相連線走HTTP即可,降低各項服務用於解密的資源。
反向代理(reverse proxy)
反向代理是一種伺服器架構,它充當客戶端與內部伺服器(通常是網站、應用程式或資源)之間的中繼站。當客戶端向伺服器發送請求時,這個請求不直接被送達給內部伺服器,而是先被發送到反向代理伺服器。
反向代理伺服器根據特定的規則和配置,將客戶端的請求轉發給適當的內部伺服器,然後將內部伺服器的回應再回傳給客戶端。在這個過程中,客戶端不會直接與內部伺服器連線,因此內部伺服器的資源和位置對客戶端來說是看不到的,比起客戶端與內部伺服器直接連線有更高的安全性。
安裝Nginx套件並確認可以正常運作
因為Nginx是長期運作的服務,所以我選擇用套件管理器安裝在Debian 12上
$ sudo apt update
$ sudo apt install nginx
安裝完利用systemctl確認一下Nginx的狀態
$ sudo systemctl status nginx
若Loaded為loaded且Active為active (running)表示Nginx已經在運作中
● nginx.service - A high performance web server and a reverse proxy server
     Loaded: loaded (/lib/systemd/system/nginx.service; enabled; preset: enabled)
     Active: active (running) since Tue 2024-01-02 22:32:01 CST; 11s ago
       Docs: man:nginx(8)
    Process: 3605 ExecStartPre=/usr/sbin/nginx -t -q -g daemon on; master_process on; (code=exited, status=0/SUCCESS)
    Process: 3606 ExecStart=/usr/sbin/nginx -g daemon on; master_process on; (code=exited, status=0/SUCCESS)
   Main PID: 3638 (nginx)
      Tasks: 9 (limit: 37986)
     Memory: 6.2M
        CPU: 58ms
     CGroup: /system.slice/nginx.service
             ├─3638 "nginx: master process /usr/sbin/nginx -g daemon on; master_process on;"
             ├─3640 "nginx: worker process"
             ├─3641 "nginx: worker process"
             ├─3642 "nginx: worker process"
             ├─3643 "nginx: worker process"
             ├─3644 "nginx: worker process"
             ├─3645 "nginx: worker process"
             ├─3646 "nginx: worker process"
             └─3647 "nginx: worker process"
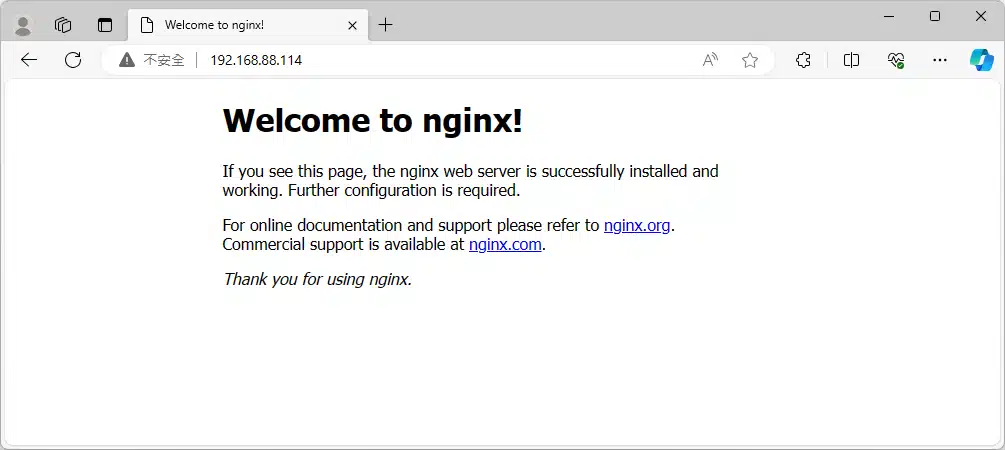
打開瀏覽器並輸入Nginx伺服器的IP,可以看到Nginx的歡迎畫面。
建立Nginx的server blocks
在/etc/nginx/sites-available/下新增一個檔案,通常用網域命名,比如說tzungshiun.com
$ sudo nano /etc/nginx/sites-available/tzungshiun.com
先給個基本設定就好,並將server_name要改成要用的域名
server {
        listen 80;
        listen [::]:80;

        server_name tzungshiun.com www.tzungshiun.com;
}
做一個symbolic link到sites-enabled資料夾底下,Nginx啟動時會讀取sites-enabled下的server block
$ sudo ln -s /etc/nginx/sites-available/tzungshiun.com /etc/nginx/sites-enabled/
若檢查/etc/nginx/sites-enabled/路徑下會有二個server block,一個是剛建立的tzungshiun.com,另一個則是default,其中default會負責處理不符合其他server blocks的HTTP連線。
再來為了避免hash bucket memory的問題,我們需要修改/etc/nginx/nginx.conf的部分內容
$ sudo nano /etc/nginx/nginx.conf
找到http區塊下的# server_names_hash_bucket_size 64;並將前面的#移除後存檔
http {

        ##
        # Basic Settings
        ##

        sendfile on;
        tcp_nopush on;
        types_hash_max_size 2048;
        # server_tokens off;

        server_names_hash_bucket_size 64;
        # server_name_in_redirect off;
        .....
}
檢查Nginx設定是否正確可以用下面指令檢查
$ sudo nginx -t
若出現下面的訊息表示設定沒有問題,可以重新啟動
nginx: the configuration file /etc/nginx/nginx.conf syntax is ok
nginx: configuration file /etc/nginx/nginx.conf test is successful
重新啟動Nginx讓設定生效
$ sudo systemctl restart nginx
安裝Let’s Encrypt憑證
以前如果需要SSL/TLS憑證是需要付費購買的,到了2014年9月,由Internet Security Research Group(ISRG)創辦的非營利性組織Let’s Encrypt成立了,其目標是推動更安全的網際網路,提供免費的SSL/TLS憑證,從而促進網絡安全和隱私保護。
安全通訊端層
安全通訊端層(SSL/Secure Sockets Layer)是一種加密技術,在使用網際網路時可以更安全地傳輸資訊。它確保在瀏覽器和網站伺服器之間的資料傳輸是加密的,防止第三方對資料的竊聽或修改。SSL通常用於保護個人資料、信用卡交易、登入資訊等敏感資訊的傳輸,當你在瀏覽器中看到網址開頭是https://而不是http://時,就表示該網站正在使用SSL加密連線,提供更安全的瀏覽環境。
傳輸層安全性
傳輸層安全性(TLS/Transport Layer Security)是SSL的後續版本,兩者通常被混用,但TLS已成為SSL的主要後續發展版本。TLS協議的第一個版本於 1999 年發佈,最新版本是 TLS 1.3,發佈於 2018 年。
Let’s Encrypt通過提供自動化的流程,讓網站管理員可以輕鬆地實現HTTPS加密連線,HTTPS能夠確保用戶與網站之間的通信是加密的,以提高了數據傳輸的安全性和隱私保護。通常,Let’s Encrypt的憑證有效期為90天,但由於其自動化的特性,可以通過工具(例如Certbot)輕鬆地自動更新憑證,使網站持續保持加密連接。
安裝Certbot與Certbox Nginx插件
$ sudo apt install certbot python3-certbot-nginx
為網域取得憑證,這裡的網域要和Nginx server block的名稱相同,這樣Nginx插件才能改寫設定
$ sudo certbot --nginx -d tzungshiun.com -d www.tzungshiun.com
會要求填入E-mail
Saving debug log to /var/log/letsencrypt/letsencrypt.log
Enter email address (used for urgent renewal and security notices)
 (Enter 'c' to cancel):
詢問是否同意服務協議
- - - - - - - - - - - - - - - - - - - - - - - - - - - - - - - - - - - - - - - -
Please read the Terms of Service at
https://letsencrypt.org/documents/LE-SA-v1.3-September-21-2022.pdf. You must
agree in order to register with the ACME server. Do you agree?
- - - - - - - - - - - - - - - - - - - - - - - - - - - - - - - - - - - - - - - -
(Y)es/(N)o:
詢問是否同意在取得憑證後將E-mail分享給EFF,EFF是Let’s Encrypt計劃的創始合作夥伴,同時也是發展Certbot的非營利組織。
- - - - - - - - - - - - - - - - - - - - - - - - - - - - - - - - - - - - - - - -
Would you be willing, once your first certificate is successfully issued, to
share your email address with the Electronic Frontier Foundation, a founding
partner of the Let's Encrypt project and the non-profit organization that
develops Certbot? We'd like to send you email about our work encrypting the web,
EFF news, campaigns, and ways to support digital freedom.
- - - - - - - - - - - - - - - - - - - - - - - - - - - - - - - - - - - - - - - -
(Y)es/(N)o:
若成功的話會出現
Saving debug log to /var/log/letsencrypt/letsencrypt.log
Requesting a certificate for tzungshiun.com

Successfully received certificate.
Certificate is saved at: /etc/letsencrypt/live/tzungshiun.com/fullchain.pem
Key is saved at:         /etc/letsencrypt/live/tzungshiun.com/privkey.pem
This certificate expires on 2024-04-01.
These files will be updated when the certificate renews.
Certbot has set up a scheduled task to automatically renew this certificate in the background.

Deploying certificate
Successfully deployed certificate for tzungshiun.com to /etc/nginx/sites-enabled/tzungshiun.com
Congratulations! You have successfully enabled HTTPS on https://tzungshiun.com

- - - - - - - - - - - - - - - - - - - - - - - - - - - - - - - - - - - - - - - -
If you like Certbot, please consider supporting our work by:
 * Donating to ISRG / Let's Encrypt:   https://letsencrypt.org/donate
 * Donating to EFF:                    https://eff.org/donate-le
- - - - - - - - - - - - - - - - - - - - - - - - - - - - - - - - - - - - - - - -
成功之後Certbot會自動幫你改寫server block的檔案內容
server {

        server_name tzungshiun.com www.tzungshiun.com;

    listen [::]:443 ssl ipv6only=on; # managed by Certbot
    listen 443 ssl; # managed by Certbot
    ssl_certificate /etc/letsencrypt/live/tzungshiun.com/fullchain.pem; # managed by Certbot
    ssl_certificate_key /etc/letsencrypt/live/tzungshiun.com/privkey.pem; # managed by Certbot
    include /etc/letsencrypt/options-ssl-nginx.conf; # managed by Certbot
    ssl_dhparam /etc/letsencrypt/ssl-dhparams.pem; # managed by Certbot

}
server {
    if ($host = tzungshiun.com) {
        return 301 https://$host$request_uri;
    } # managed by Certbot


        listen 80;
        listen [::]:80;

        server_name tzungshiun.com www.tzungshiun.com;
    return 404; # managed by Certbot


}
確認憑證更新時程
利用systemctl檢查certbot.timer是否有運行
$ sudo systemctl status certbot.timer
Certbot每天會做二次憑證的有效期限檢查,若需要更新時Certbot會自行更新憑證。
● certbot.timer - Run certbot twice daily
     Loaded: loaded (/lib/systemd/system/certbot.timer; enabled; preset: enabled)
     Active: active (waiting) since Sun 2023-12-31 09:38:20 CST; 3 days ago
    Trigger: Thu 2024-01-04 09:43:54 CST; 9h left
   Triggers: ● certbot.service

Dec 31 09:38:20 debian-pc systemd[1]: Started certbot.timer - Run certbot twice daily.
如果需要測試憑證更新是否有問題,可以輸入下列指令
$ sudo certbot renew --dry-run
後記:Nginx常用的檔案與資料夾
- /etc/nginx/ : Nginx相關設定都在這個資料夾內。
- /etc/nginx/nginx.conf : Nginx主要的設定檔,屬於基礎且全域的設定。
- /etc/nginx/sites-available/ : 儲存「可能會使用到」的server blocks的相關設定,這裡可以有多個設定檔案,每個檔案代表一個server blocks的配置,Nginx啟動時不會讀取這個資料夾內的檔案。
- /etc/nginx/sites-enabled/ : 儲存「實際使用」的server blocks的相關設定,Nginx在啟動時會讀取這個資料夾的內容,只有在這個目錄下的配置檔才會被 Nginx 實際載入和使用。。
這樣的架構可以讓你在/etc/nginx/sites-available/目錄中管理所有可能的server blocks設定,當需要啟用或停用特定的server blocks時,只需處理二個資料夾之間的symbolic link即可,不需要修改或刪除原始配置檔案。這種設計使得管理多個server blocks變得更加靈活和容易。